In the previous post, HowTo: Access your self-hosted applications in Secure Network we saw how you can set a Zero Trust tunnel and gain access to the devices in your network, in this article we are going to take it up further with CloudFlare. CloudFlare adds another service with the tunnel i.e. domain name manager or DNS handling. This allows you to attach the sites/services you have self-hosted in your personal network, enabling them to be remapped with the website name or a domain name accessible from anywhere on the internet. Another good thing about using CloudFlare is, that the Zero Trust Tunnel and Public Domain mapping service both are kind of free for home lab users, this adds another advantage. This is really helpful if you already own a domain name, as you might want to host just a couple of services. This article will help you set up a domain proxy for your home server.
Step 1 – Sign up on CloudFlare
Sign up on the CloudFlare website using a username and password. Then log in to the dashboard, on the first page, you will see an “Add a domain” button, click on it, and add your domain. Once done, go to the home page again, and click on the
domain name > DNS > Cloudflare Nameservers
Here you will see the nameservers for your DNS provided by CloudFlare, just update the name server where you bought the domain name from.
Step 2 – Creating the tunnel
While the name servers are updating, you can go the
Left-hand menu > Zero Trust > Networks > Tunnels
and click on “Create a tunnel” and then select “CloudFlared”, then name the network the tunnel will be connecting to. The technology behind the tunnel is the same as other VPN providers but CloudFlare allows you to configure domains on the other side of the tunnel. The next page will provide you all the options to initiate a tunnel on your system depending on your situation. I personally prefer the docker method stated while using a simple docker-compose.yaml as follows
version: "3.8"

services:
  cloudflared:
    container_name: cloudflare-tunnel
    image: cloudflare/cloudflared:latest
    restart: unless-stopped
    command: tunnel run
    environment:
      - TUNNEL_TOKEN=<copy and paste your token here>
    network_mode: bridge
Just replace the placeholder for the token in the above block of code. I recommend going through the network_mode to ensure you get an IP for the docker container generated. After that, ensure the tunnel has been initiated on the CloudFlare Tunnel page.
Step 3 – Adding a subdomain
Once you have started one end of the tunnel, it’s time to begin mapping the main domain and subdomains to the various services hosted in your network. You can do that by going to the tunnel page, clicking on the 3 dots on the right of the tunnel entry, and configuring. Here, go to the “Public Hostname” tab then “Add a public hostname” and then fill out the form, subdomain, then select the domain name from the dropdown, and subpath if you want to have one. Then fill out the important information about the local IP of the site you have in your local network along with the port number.
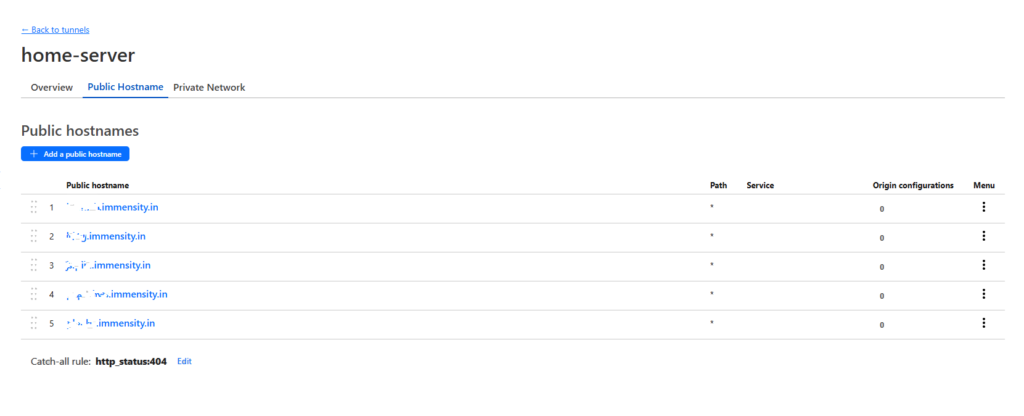
As you can see in the above screenshot, I have multiple services hosted at my home, along with this blog. This is a great way to start self-hosting services for your family members or to host test sites. I won’t recommend using this as your primary server as it requires you to make sure you have a stable internet connection and a power supply to keep the machines running 24×7, but it’s a great way to test development and other sites without investing in a static IP address from your internet provider or investing in hosting services.
If you are concerned about privacy and don’t want to make certain services public, you can try other services that require VPN to be installed on all client devices. you can read more about it here.
4 thoughts on “HowTo: Access your self-hosted applications over the Internet”