Komodo is another Docker Management application, it’s not as well known as Portainer but it is perfect for self-hosting community members who run a finite number of applications in Docker. In some scenarios, Komodo is more intuitive and user-friendly when managing multiple docker environments. Unlike other similar tools, Komodo doesn’t have a paid version, but you get all the features packed in a single open-source application. Let’s see what makes it more appealing than its competitors.

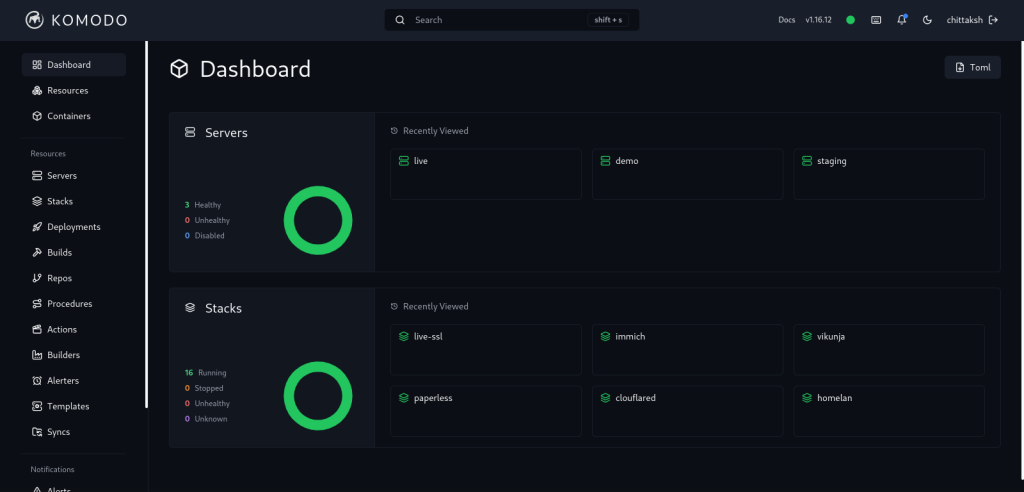
Right from the login screen, a simple and extremely interactive system. The use of charts and information displays makes it extremely easy to understand and manage the docker stack, container, and various other aspects. You need to make sure that you keep the compose files
Installation
Installing Komodo requires you to have a basic knowledge of how docker-compose works, which makes it a bit more complex to install as it has multiple services running for it. At the same it, it gives you the freedom to have multiple different database options to store all the details. There are 3 options to choose from based on the database you want to use. You can choose from:
- MongoDB
- Postgres
- SQLite
We went with the easiest and least power-consuming option for the data storage SQLite, but the process is almost similar for all different database options, just the file name changes for the compose.yaml. Like, other applications you just need to create a compose file or you can download the compose files on the system from the git repo’s compose folder. You have to download the sqlite.compose.yaml file along with the compose.env to a directory with the docker installation. After that modify the compose.env and set variables as per your needs. You can use the following command in that folder to get up and running with the Komodo environment.
docker compose -p komodo -f sqlite.compose.yaml --env-file compose.env up -dThe first time you run, you have to sign up and the first user is granted the “Super Admin” role. After that other users can sign up and can be made “Admin” by the Super Admin User from the “Users” screen.
Installing Periphery
Installing periphery for a connecting docker system to be managed by the remote Komodo instance is easy as well. You can use periphery.yaml sample from this link and use the following command on the remote system to be connected to the main system.
docker compose -p komodo-periphery -f periphery.yaml up -dUpdating
While updating, you again need the compose files that you have used while installing the Komodo instance. To be on the safe side, you first need to pull the image updates, to make sure there are updates released for the images and it also ensures the integrity of the compose file.
docker compose -p komodo -f sqlite.compose.yaml pullOnce you have pulled the image the next step is to take down the current application instance using the compose down command. Make sure you haven’t made any changes to the compose file till now.
docker compose -p komodo -f sqlite.compose.yaml downOnce the current instance is taken down, make changes to the compose file and the environment variables if required, and then start the Komodo instance again using the following command.
docker compose -p komodo -f sqlite.compose.yaml --env-file compose.env up -dUpdating Periphery
Updating the periphery follows the same method as the core application follows, also the periphery doesn’t need to be updated each time the core application has an update. As the developers state, it will be stated in the release note if a periphery update is required or not or even if it’s mandatory for the latest version.
To start you can pull the image using the docker compose used while deploying the periphery using the following command.
docker compose -p komodo-periphery -f periphery.yaml pullOnce, the latest image has been downloaded, you can then take the current periphery instance down using the following command:
docker compose -p komodo-periphery -f periphery.yaml downIn the end, you just need to redeploy the periphery again, using the command below. It’s the same for deploying the docker-compose previously.
docker compose -p komodo-periphery -f periphery.yaml up -dUsage
Once you are set up with the application, you will always feel at ease performing any task with it. It’s one of the most easy-to-use applications with a clear and fully controlled environment. At any moment you will be able to see what’s going on in any docker environment, with any and all stacks that you have created and running at the moment.
You can also use git source code to build your own docker images and host inside a specific environment, update and maintain the docker images as well.
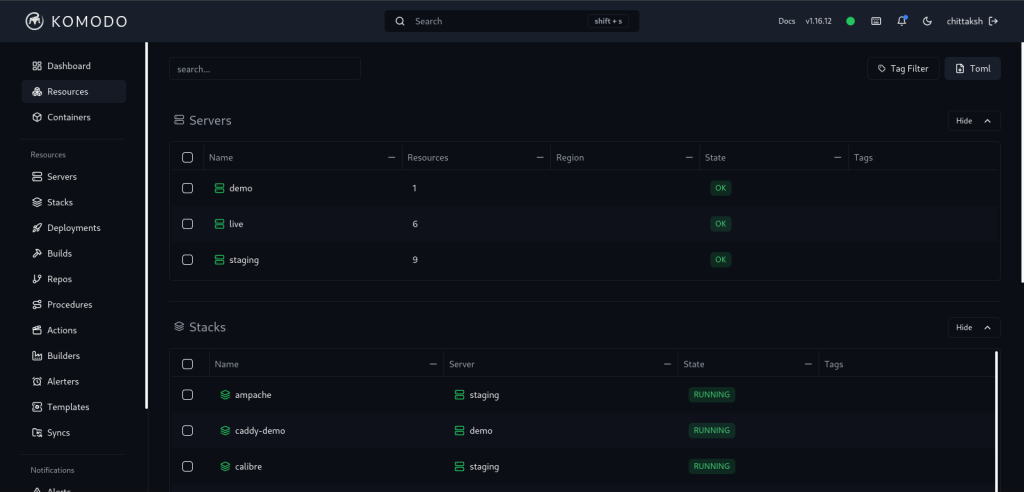
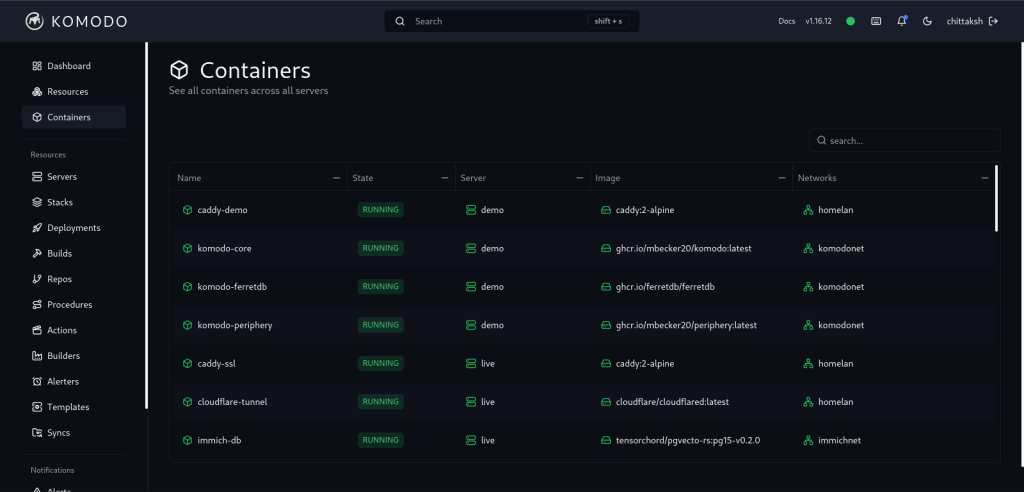
The user interface is also divided into proper regions to make navigating and tracking everything a breeze. From environments to resources to each container, you can track them all with minimum clicks. You can view all the environmental information when you open its details, like images, networks, volumes, and containers alongside its usage stats such as CPU, memory, and disk.
Along with proper presentation, you can set stack to auto-update, which removes the requirement for any other tracking method like DIUN or watchtower. Having this feature is great with the free version compared to other similar applications.
Uninstalling
Navigate to the folder where you had your docker-compose files stored for the Komodo installation and run the following command. Make sure you haven’t changed the file since the last installation as while uninstalling, it removes everything created for Komodo except for the persistent data.
docker compose -p komodo -f sqlite.compose.yaml downUninstalling Periphery
Similarly, as above navigate to the folder where you had stored the periphery.yaml and fire up the following command. It will take down the periphery container as well as the stack.
docker compose -p komodo-periphery -f periphery.yaml downThe following two commands need to be executed for both, the full installation or just the periphery version as it removes the downloaded unused images and removes all the unused volumes:
docker image prune -f
docker volume prune -f
Pros
Completely open-source and free-to-use application.
Can handle multiple types of environments with a single installation.
Allows auto-updating stack images.
Clean and Easy to Use User Interface.
Easy access to terminal of any docker container.
The application is under active development.
Cons
At the time of this writing, doesn’t support Kubernetes or any clustering.
Finding support is relatively complicated as the name of the application is similar to a Software Development IDE.
Logs can only be viewed on a per-container basis, not as per stack.
Conclusion
Komodo is a great option while trying to decide how you want to manage your docker-compose stacks. It provides more features than most of the other options out there, for free and is also in active development for new features. This has been my personal favorite Docker Management Application for the last few months.